

Table of Contents
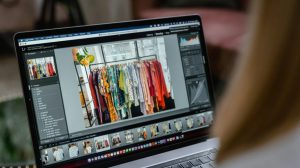
You’ve designed a graphic that looks sharp on your screen. The layout works. The text reads clearly.
The colors pop. But once you upload it to social media, something’s wrong. Maybe your headline is clipped.
Maybe your call to action gets pushed off the frame. Or worse, your entire image looks blurry. That’s not just a glitch. It’s a formatting issue.
Every platform, including Instagram, Pinterest and LinkedIn, has its own preferred image dimensions. Each one crops, compresses, or displays content differently.
If you don’t size your images specifically for each platform, you risk compromising the very visuals you worked so hard to create.
Resizing is one of the easiest ways to make sure your content looks professional, loads quickly, and makes an impact across all platforms. Let’s find out more.
How to Perfectly Resize Images for Social Media Without Losing Quality?
Use an Image Resizer
When you’re publishing across multiple platforms, using an image resizer helps maintain clarity and intent.
It allows you to create multiple versions of the same visual, tailored to different frame sizes without distorting layout or resolution.
You can adjust each image’s proportions without starting over. Move elements around. Scale text appropriately. Create breathing room where it’s needed. A resizer gives you that flexibility.
This control is especially important when your content contains fine details or layered elements.
Instead of letting platforms compress or crop at random, you stay in charge of how your design appears, especially when paired with a tool like a color palette generator to ensure visual consistency.
Instagram: Beyond the Square
Instagram may be known for its square grid, but that’s not your only option. The platform supports several formats:
- Square: 1080 x 1080 pixels
- Portrait: 1080 x 1350 pixels
- Landscape: 1080 x 566 pixels
- Stories and Reels: 1080 x 1920 pixels
Portrait images usually get more screen space in the feed, which often leads to better engagement. But only if they’re resized properly.
A good image resizer lets you test each layout. You can shift your headline upward, make the background image stretch, and avoid placing text too close to the edges where it could be trimmed.
You can also experiment with how your visuals interact with user gestures. For example, story content that guides the eye vertically can hold attention longer.
A strong opening image sized correctly for that space may keep users from swiping away too fast.
Pinterest: Taller Is Better
Pinterest thrives on vertical scroll. The taller your pin, the more real estate it gets in someone’s feed. But that doesn’t mean you should just stretch your image vertically.
The recommended size for a standard pin is 1000 by 1500 pixels. The maximum ratio before Pinterest begins cropping your content is 2:3. If your image is too long or too wide, it may get cut off in previews.
Using a resizer helps you work within these boundaries while still allowing room for creativity. You can extend the background, shift text upward, or even duplicate sections to fill space.
That kind of adjustment gives your content more presence without distorting your layout.
LinkedIn: Polished and Professional

LinkedIn posts don’t allow for visual sloppiness. It’s a platform where your visuals represent your credibility. A post image that’s even slightly off feels out of place.
Stick to the following dimensions:
- Post Image: 1200 x 627 pixels
- Banner/Header: 1128 x 191 pixels
- Link Preview: 1200 x 627 pixels
If your file is too large, LinkedIn compresses it automatically. If it’s not sized correctly, parts of the design might get clipped. A small misalignment here can affect how your brand is perceived.
Resizing helps you adapt your image for LinkedIn’s horizontal frames. It also keeps things sharp across various devices.
Add margins, check spacing, and make sure any text stays readable on mobile. These small touches go a long way.
Keep Your Text Legible Everywhere
Resizing is especially important when your design includes text. A line that reads fine in a square image might shrink to the point of being unreadable when converted to a story format.
Resizing gives you the opportunity to adjust font size, shift line breaks, and re-center the message.
For quote cards, testimonials, or promotional headlines, this can make or break the design’s effectiveness.
Some creators also use resizing to separate text and visuals. They’ll layer the quote in a dedicated top half and let the imagery rest below it. This split-screen layout adapts well across vertical and square formats.
Maintain Visual Harmony
Each platform’s default ratio shifts how content is viewed. A square composition centers attention. A vertical one draws the eye upward. A horizontal layout encourages side-to-side scanning.
By resizing, you can account for these differences. Move the focal point. Expand background elements. Use padding or overlays to balance the visual weight.
You’re not changing your message, you’re adapting the shape of it so it fits better. This keeps your branding consistent while enhancing readability and structure on every channel.
Batch Resizing
Managing visuals across multiple formats can be time-consuming. And manually cropping or scaling each one? That’s a recipe for inconsistency.
Batch resizing saves time. You can take one core design and output different sizes based on preset dimensions for each platform. Instagram feed. Pinterest pin. LinkedIn post. All ready at once.
With fewer steps, your team spends more time focused on content strategy and less on correcting upload errors.
It also helps you avoid those last-minute scrambles before publishing. Whether you’re managing a personal brand or a multi-channel content calendar, batch resizing becomes an essential part of your workflow.
A Real Example: Promoting a Webinar Across Platforms
Imagine you’re launching a webinar and want to post the announcement across Instagram, Pinterest, and LinkedIn.
- Your Instagram story needs bold text and a vertical format.
- Pinterest wants a tall pin with a scroll-friendly title.
- LinkedIn prefers a banner-style graphic with clean spacing.
With resizing, you build one solid base, then adapt it three times.
The story version enlarges the speaker’s face and stacks the event title for mobile clarity. The pin version gives more room for bullet points and background texture. The LinkedIn version stretches horizontally and moves the CTA button to the bottom right.
No guesswork. Just versions that work, tailored for each platform’s rhythm.
Compression Can Blur Your Work
Even if you upload a high-resolution file, platforms still compress it to optimize performance.
Unfortunately, that compression often causes blurring or distortion, especially with small text or gradient-heavy backgrounds.
Resizing before upload helps avoid that problem. When your image is already sized appropriately, there’s less for the platform to modify.
You can also compress the image manually and choose the format that best suits the graphic: JPEG for photography, PNG for text-based images, or WebP for a lighter, high-quality balance.
The result is faster loading, crisper lines, and fewer surprises after you hit “publish.”
Why Resizing is Important?

Many people try to cut corners by using one image across every platform. But what saves time in the moment often costs performance in the long run.
A bit of effort upfront with a good image resizer saves time fixing mistakes later. It also shows that you care about your work, your brand, and the people seeing it.
You’re not just pushing content into the feed. You’re building a visual presence that earns attention and trust. Resizing helps you do that with more consistency and less stress.
Conclusion
Social platforms each have their own energy and rhythm. Your visuals need to match those spaces, not fight against them.
Resizing your images keeps them clear, properly cropped, and visually consistent. It helps your design communicate, not just decorate.
An image resizer simplifies the process. It gives you a repeatable system that adapts one design into many versions, each fine-tuned to the platform where it will live.
If you want to look polished, perform better, and create a stronger brand impression, start resizing with intention. Your audience, and your future self, will thank you for it.